
Ever spotted a picture and thought, "I wish I could create something just like that"? That's exactly what a prompt from image workflow lets you do. It's a way of using a picture as the direct starting point for a new AI-generated piece, letting the visual do the talking instead of just relying on text.
From Inspiration to Creation with Image Prompts
Shifting from a purely text-based process to a visual one is a huge boost for creative efficiency. It closes the gap between the idea you have in your head and the final output. The image itself does the hard work of explaining complex visual ideas that are often tricky to describe with words alone.
Think about it. How would you describe the specific hazy glow of a sunset over a cyberpunk city? Or the exact texture and style of a Van Gogh painting? Trying to get those nuances right in text can be a real struggle.
Using a reference image cuts right through that problem. Glima AI looks at all the visual information—colour palettes, lighting, composition, even artistic textures—to build a descriptive launchpad for your new project.
The Two Core Methods
When you get down to it, this process offers two main paths, and the one you choose really depends on what you're trying to achieve. You can go for a quick, automated workflow or take a more hands-on, manual approach for finer control.
- Automatic Prompting: This is your go-to for speed and convenience. You just upload an image, and Glima AI instantly generates a detailed text prompt based on its analysis. It's fantastic for brainstorming or when you need to quickly spin up different variations of a particular style.
- Manual Crafting: This route gives you ultimate control. You break down the reference image yourself, writing a prompt that pinpoints exactly which elements you want the AI to focus on, replicate, or even change. This is the preferred method for artists and designers who have a very precise vision in mind.
To help you decide which Glima AI workflow is best for your current creative task, here’s a quick comparison.
Automatic vs Manual Image Prompting
| Method | Best For | Key Benefit | Time Investment |
|---|---|---|---|
| Automatic Prompting | Quick brainstorming, style exploration, rapid content creation. | Speed and ease of use. | Minimal |
| Manual Crafting | Precise control, recreating specific details, detailed artistic direction. | High degree of customisation. | Moderate to High |
Ultimately, both paths give you powerful tools to work with. The right choice just depends on whether your priority is speed or surgical precision.
The real magic of using an image as a prompt is its ability to capture those hard-to-define qualities. An image communicates a mood and a feeling in a way text often can’t, giving the AI a much richer, more nuanced source of inspiration to pull from.
This technique is a game-changer for anyone working in a creative space. Marketers can generate on-brand lifestyle photos in minutes, designers can rapidly prototype different art styles, and content creators can produce visuals that perfectly match their aesthetic without spending hours wrestling with complicated descriptions.
To see how this works in practice across different industries, you can explore some of Glima AI’s diverse use cases. It’s all about turning that flash of visual inspiration into a real, tangible creation.
Let Glima AI Automatically Generate Prompts
Sometimes you just need to get moving quickly, without getting bogged down in writing the perfect prompt from scratch. This is where Glima AI’s automatic prompt generation really shines. It’s a lifesaver when you have a reference image and want creative, high-quality results without the guesswork.
Think of it like this: you’re a social media manager and spot a competitor’s ad with a brilliant visual style. You want to capture that same feel—maybe it’s the ethereal lighting or the muted pastel colour palette—for your own campaign. Instead of fumbling for the right words, you can just feed that ad into Glima AI. The platform does the heavy lifting for you, instantly spitting out a detailed text prompt that nails the essence of that visual.
It’s an incredibly straightforward and surprisingly powerful way to kickstart your creative process.
How Does It Work Under the Hood?
At its core, this feature relies on Glima AI’s smart visual analysis. When you give it a picture, the AI meticulously scans it for the key ingredients that make up its unique look and feel.
- Subject & Composition: First, it figures out the main subject and how it’s framed. Is it a tight portrait, a wide-open landscape, or a carefully arranged flat-lay shot?
- Lighting & Mood: The AI is trained to see the light. It’ll detect whether the scene is lit by harsh midday sun, a cinematic neon glow, or soft, diffused window light, which directly shapes the mood of the generated prompt.
- Artistic Style: It also picks up on more subtle cues like textures, brushstrokes, and visual effects to determine if the style is photorealistic, anime, a 3D render, or something more painterly.
The final output is a ready-to-use text prompt. You can immediately use it to generate a whole new set of unique images that carry the spirit of your original inspiration.
The biggest win here is speed. In a matter of seconds, you can turn a single point of inspiration into a dozen different creative paths, all from a prompt you didn’t have to painstakingly write yourself.
Practical Uses and a Few Pro Tips
Imagine you’re a product designer. You could upload one fantastic photo of your product, and the auto-generated prompt could be used to create an entire series of lifestyle mockups. Suddenly, your product is shown in all sorts of different settings, and you didn’t have to spend a penny on a physical photoshoot. The time and resource savings are huge.
If you’re looking to push this even further, it’s worth learning how to generate AI models for clothing, which is another great example of how AI can slash production costs while expanding your visual library.
Now, for a bit of expert advice: the quality of your reference photo really matters. To get the most accurate and creative prompts, always start with an image that has a clear subject, good lighting, and a distinct style. A blurry, low-res picture just doesn’t give the AI enough data to work with, and you’ll end up with a more generic prompt. A strong input always leads to a stronger output.
This automatic approach is a fantastic starting point. For instance, you could use it with a powerful model like Ideogram—you can learn more about its capabilities for creating stunning typography right here. Once Glima AI gives you that initial prompt, you can always jump in and tweak it yourself, nudging the final result even closer to what you have in mind.
Manually Crafting Your Perfect Image Prompt
Auto-prompting tools are a massive time-saver, no doubt about it. But when your creative vision demands pinpoint accuracy, nothing beats rolling up your sleeves and crafting the prompt yourself. This is where you get to be the director, not just a spectator. Think of it as the difference between asking for “a nice landscape” and handing a detailed brief to a master painter. You get total control over the final piece.
The process turns you into a bit of a visual detective. You’ll need to deconstruct your reference image, breaking it down into its core building blocks and translating what you see into descriptive language that Glima AI can really sink its teeth into.
The goal isn’t just to describe what’s in the picture. It’s to capture its essence—the mood, the style, the composition, all of it.
Deconstructing Your Reference Image
Look at your reference image as a stack of different layers. Your job is to peel them back, one by one, and describe what you find. A solid manual prompt almost always breaks down into five key components, which you can then feed directly into Glima AI.
- Subject: What’s the main focus? Get specific. Don’t just say “a car”—try “a vintage red sports car from the 1960s.”
- Action: What is the subject up to? Is it sitting still or flying by? Maybe it’s “driving quickly down a coastal road at sunset.”
- Environment: Where is all this happening? Describe the background and everything around the subject. For instance, “a winding road along the cliffs of the Amalfi Coast, with the turquoise ocean below.”
- Lighting: How is the scene lit? This is absolutely critical for setting the mood. Use evocative words like “golden hour lighting, long shadows, lens flare.”
- Artistic Style: How was the original image made? Is it a photo, a painting, a 3D render? Something like, “hyperrealistic, cinematic photograph, high detail, 8K resolution” works wonders.
Breaking it down this way makes sure you don’t overlook the little details that made the original image so compelling in the first place.
Putting It All Together in Glima AI
Once you’ve got your descriptive ingredients, it’s time to assemble them into a cohesive prompt. The order matters more than you’d think, as it can influence the final output. I find it’s usually best to lead with the most important element—nine times out of ten, that’s your subject.
The workflow in Glima AI is beautifully simple. You upload your image, let the system analyse it for a moment, and then it generates the final output based on the detailed prompt you’ve provided.
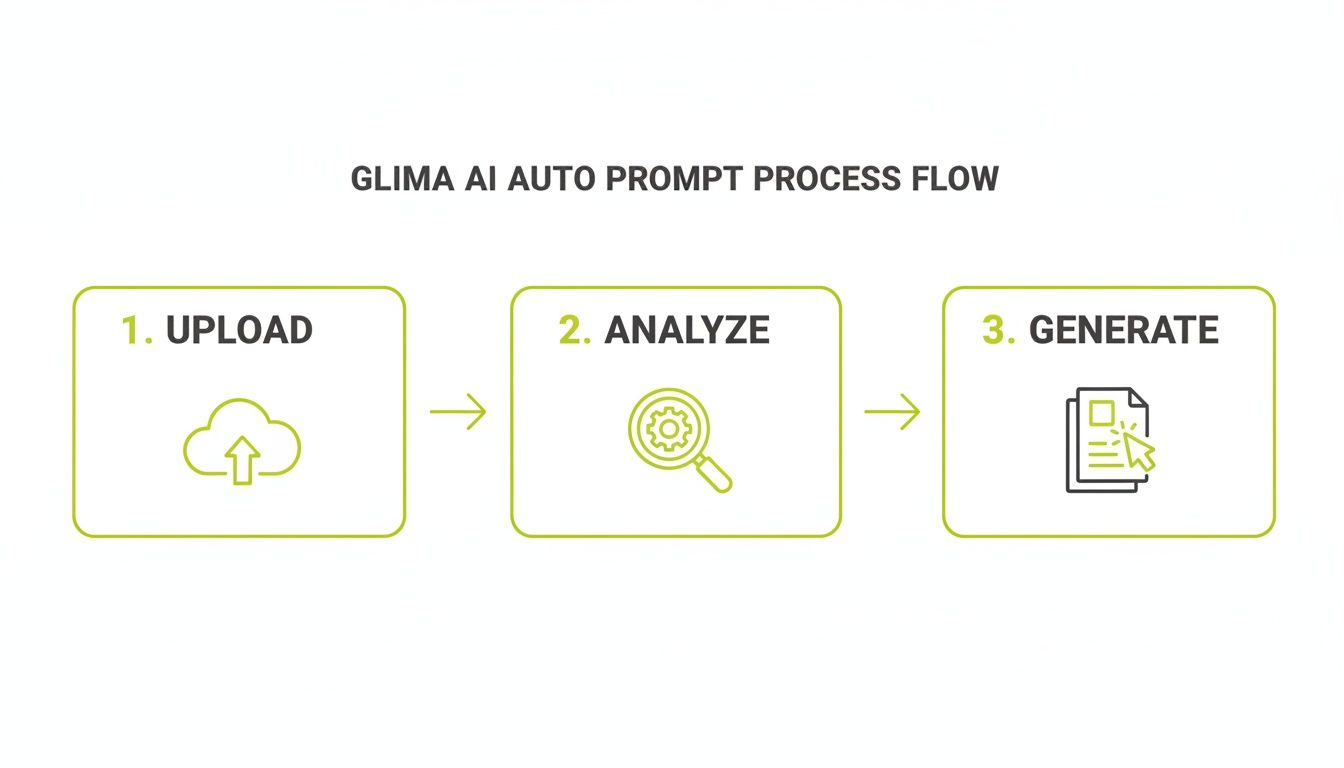
As you can see, whether you’re using an auto-generated prompt or one you’ve painstakingly crafted yourself, the core steps within the platform stay straightforward and intuitive.
Let’s take a real-world example. Imagine an illustrator wants to transform a photo of a bustling Tokyo street into an anime-style masterpiece. They might manually write a prompt like: “Vibrant anime scene of a Tokyo street at night, glowing neon signs, steam rising from food stalls, pedestrians with umbrellas, Studio Ghibli art style, cinematic lighting.” You can get a feel for what’s possible by exploring Glima AI’s huge library of different art styles and templates to find the perfect look for your project.
The real power of manual prompting is its specificity. You’re not just showing the AI an image; you’re guiding its interpretation, telling it precisely which elements to focus on and which to completely reimagine.
This kind of control is a game-changer, especially in fast-moving markets. Take Singapore, a major AI hub in Southeast Asia. The market there is a big part of APAC’s projected 23.5% CAGR from a global value of $2.36 billion in 2025. In this environment, the ‘prompt from image’ technique is indispensable. Advertising teams are generating brand-aligned visuals 5x faster by uploading reference images. E-commerce giants have slashed product photography costs by up to 55%, and surveys reveal that over 78% of local illustrators are more than happy using style templates to get a specific look, like turning a simple sketch into something photorealistic.
Combining Multiple Images in Your Workflow
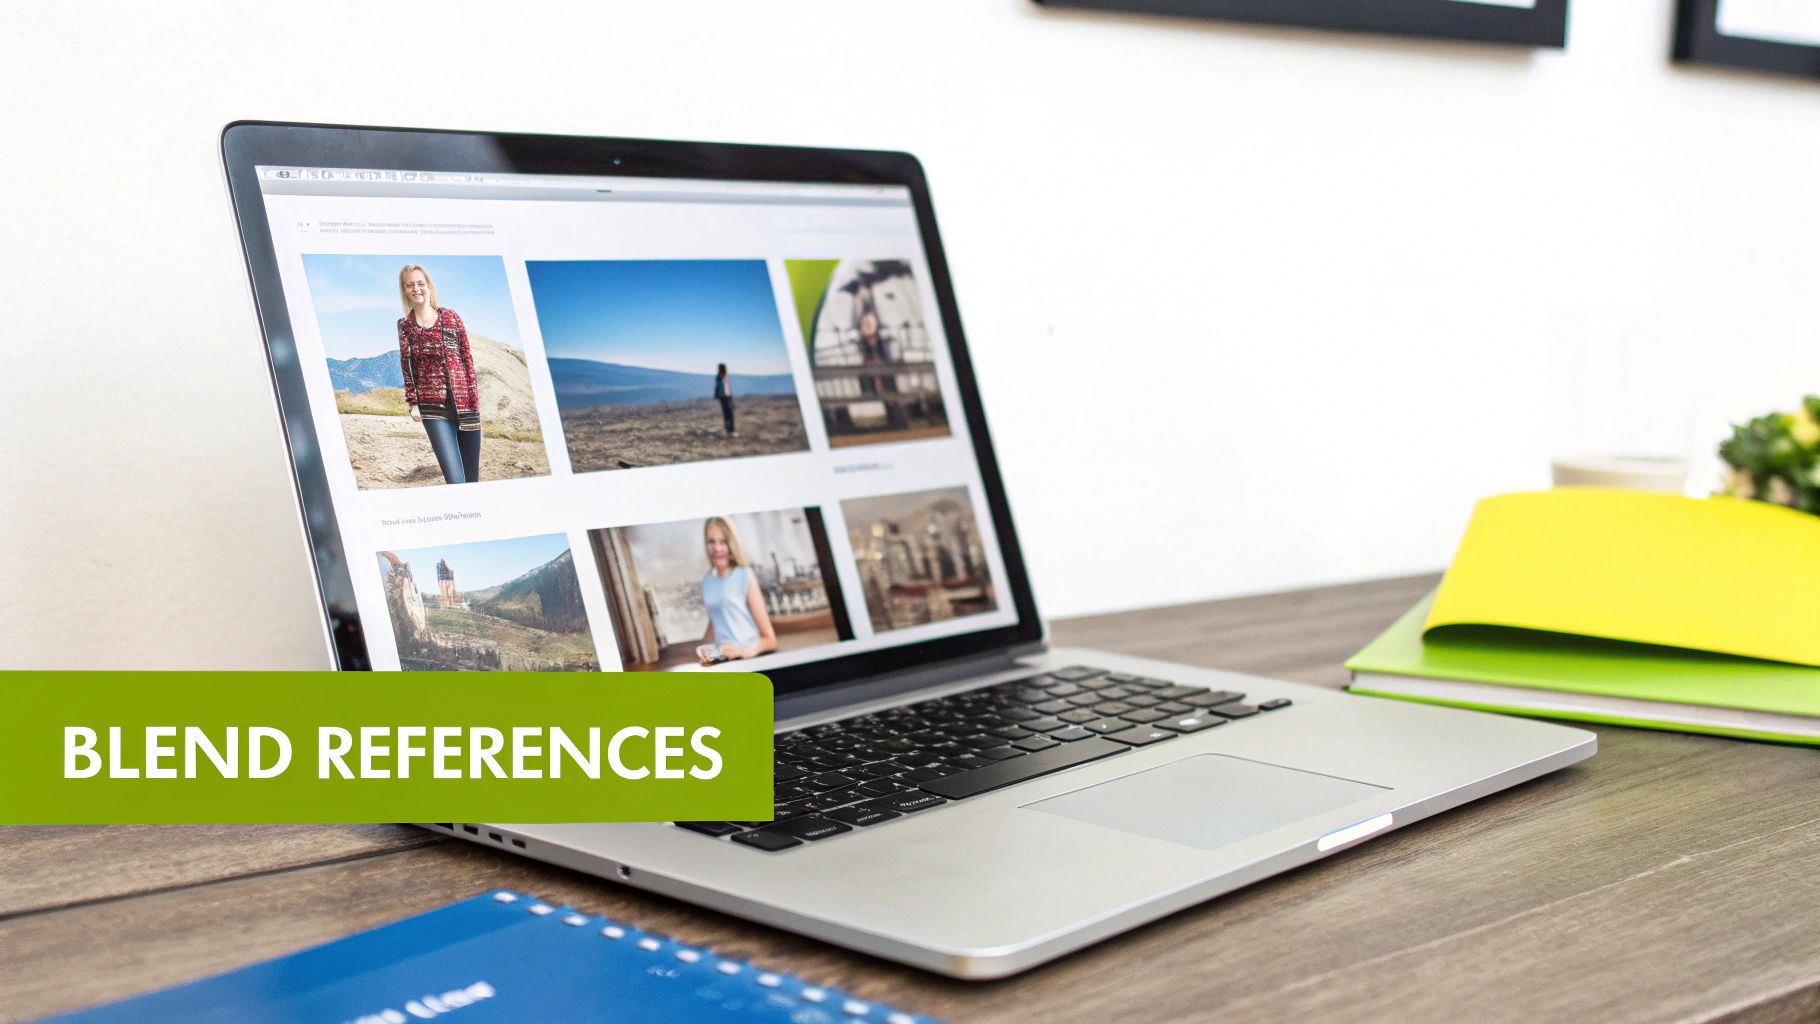
Working with a single reference image is great, but the real creative magic begins when you start blending multiple sources. This is where you can borrow the best bits from several different images and fuse them into one cohesive vision—a more advanced way to approach a prompt from image workflow.
Instead of just trying to replicate one style, you can now mix and match. You might pull the moody, cinematic lighting from one photo, the main subject from another, and the background from a third. That’s the essence of a multi-reference workflow.
The Art of Visual Blending
There’s a reason this method is so popular with marketing teams and filmmakers. Think about creating a complex product mockup. You could start with a high-quality shot of your product, grab a picture of a scenic beach for the background, and then find a third image with the perfect sunset glow to dictate the lighting.
By pulling these references together, you’re telling Glima AI to synthesise a completely new scene that cherry-picks the key features of each. You’re not just copying; you’re building a composite reality. When your work involves building on existing visuals, understanding how Image-to-Image AI functions can be a huge help.
A Real-World Marketing Scenario
Let’s walk through a practical example. Say a marketing team for a new line of sustainable trainers needs a hero image for their next campaign. They want to show the shoe in a lush, urban jungle, but a big photoshoot isn’t in the budget.
Here’s how they could tackle it with Glima AI:
- Reference One (The Subject): A crisp, well-lit studio photo of the trainer on a simple background.
- Reference Two (The Environment): A picture of a vibrant, plant-filled conservatory or a leafy city park.
- Reference Three (The Style): An image with a soft, natural morning light to give the final shot a fresh, organic feel.
The AI then gets to work, intelligently merging these inputs. It’ll place the trainer into that green environment and apply the lighting style from the third image, making sure everything looks like it belongs together. For a deeper dive into this, check out our guide on Glima’s https://glima.ai/image-generator/ai-image-combiner.
This multi-reference approach fundamentally changes creative prototyping. It allows for the rapid testing of complex visual concepts that would otherwise require significant time, resources, and coordination to produce traditionally.
This technique has had a huge impact on creator economies worldwide. For instance, Southeast Asia’s generative AI scene is thriving, empowering over 20 million creators to produce hyper-localised content. Marketing teams have reported 65% faster campaign prototyping, cutting agency spending by the INR equivalent of $500 million each year. Meanwhile, 75% of designers in Jakarta rely on these methods to hit tight deadlines, especially when they need to customise visuals for local culture.
Fine-Tuning Your Vision: Advanced Prompting and Editing
Getting that first image from your prompt is a great feeling, but the real magic happens next. This is where you graduate from just giving instructions to truly directing the AI, guiding it towards the exact image you have in your head. A few advanced tricks for prompt engineering and editing can make a world of difference.
One of the most useful tools you have is the negative prompt. It’s your way of telling Glima AI what to leave out. If your images keep showing up with blurry backgrounds, weirdly rendered hands, or colours that just don’t work, you can steer the AI away from them. Something as simple as --(no blurry, deformed hands, oversaturated) can clean up your results before you even see them.
You can also get incredibly precise control by using prompt weights. This is how you tell the AI what’s most important in your scene. By adding a plus sign (+) or using parentheses, you can dial up the emphasis on certain elements. Let’s say you want a futuristic city with a red flying car. To make sure that car is the centre of attention, you could write futuristic city with a (red flying car)++. Now, the car is the undeniable star.
Evolve Your Image Through Iteration
The secret to a stunning final image isn’t getting it right on the first try—it’s iteration. Think of your first generated image as a starting point, a draft. From there, you can make small, intentional changes to your prompt to explore different possibilities.
My advice? Tweak one thing at a time. If the lighting feels off, adjust only the lighting keywords and regenerate. This methodical approach is the best way to learn how specific words influence the AI’s output, quickly turning you into a more intuitive prompter.
The most successful AI artists are masters of iteration. They understand that the first output is just a conversation starter; the real work lies in the back-and-forth dialogue with the AI, making small adjustments to guide it toward the perfect final image.
This iterative workflow is becoming a game-changer, especially in fast-moving creative markets. In India, for instance, the AI image generator scene is booming. Adoption has shot up by 45% year-over-year among marketing teams using a prompt from image process. For the 500 million Instagram Reels creators in India, using prompt-based visuals has even boosted engagement by an average of 28%. You can dive deeper into the growth of the AI image generator market to see the full picture.
Add the Final Polish with Glima AI’s Editing Tools
Once you’ve nailed the generation, Glima AI’s built-in editing suite is where you add that final professional touch. These tools are designed to handle common imperfections and get your image ready for anything.
- Magic Eraser: Got a distracting little object that snuck into your otherwise perfect scene? The Magic Eraser lets you paint right over it, and it’ll disappear as if it were never there.
- Unblur: If your subject’s face or a crucial detail isn’t quite sharp enough, the Unblur tool can bring back that crisp clarity. It’s perfect for rescuing an almost-perfect shot.
- Upscaler: When your image is ready for the world, the Upscaler increases its resolution without losing quality. This makes it perfect for high-definition displays, print, or any professional project.
By combining smarter prompt engineering with these handy editing tools, you can take any idea from a rough concept to a polished, high-resolution masterpiece.
Frequently Asked Questions
When you’re getting the hang of a new creative tool, a few questions are bound to pop up. Here are some answers to common queries we get about using the prompt from image feature in Glima AI, so you can clear any hurdles and get right back to creating.
What Type of Images Work Best as a Reference?
You’ll get the best results from high-quality, well-lit images with a clear subject and a distinct style. Think of it this way: while Glima AI is incredibly smart, giving it a strong reference image provides more detailed visual data to work with from the start.
If you’re trying to nail a specific aesthetic, pick images that showcase that style consistently. For referencing a subject or composition, make sure those key elements are sharp and in focus. The clearer the input, the more accurate the output.
Can I Combine a Text Prompt with an Image Prompt?
Absolutely. In fact, this is where some of the most creative workflows come to life. Use the ‘prompt from image’ feature to get a solid baseline description and capture the overall vibe, then jump in with your own text to tweak details or introduce something entirely new.
For instance, you could start with a photo of a serene forest to set the scene and lighting. Then, you could add a simple text prompt like, “a futuristic chrome robot walking on the path,” to drop a new character right into that environment. It’s a fantastic way to blend AI-generated ideas with your own.
Think of the image prompt as your foundation and the text prompt as your tool for customisation. This combination gives you the speed of AI analysis with the precision of your own creative direction.
How Can I Ensure Brand Consistency with Image Prompts?
Keeping a consistent brand identity is a big deal, and this feature can be a huge help. The best approach is to build a dedicated library of on-brand reference images that perfectly capture your brand’s colour palette, photography style, and overall mood.
Start every new creation using one of these approved images. From there, you can refine the AI-generated text prompts by adding brand-specific keywords. Don’t forget to explore Glima AI’s extensive style library, which is another great resource for applying a consistent look across all your visuals.
What if the AI Misunderstands My Reference Image?
It happens! If an automatically generated prompt doesn’t quite hit the mark, don’t sweat it. Your best bet is to switch gears and go manual. Take a moment to break down the image yourself and write a descriptive prompt that zeroes in on the specific elements you actually want to replicate.
Iteration is also part of the creative process. Make small tweaks to your prompt and regenerate the image a few times. And remember, Glima AI has powerful editing tools like the Magic Eraser or Background Remover to clean up any outputs that aren’t quite perfect.
Ready to turn your visual inspirations into stunning new creations? With Glima AI, you can generate and edit high-quality images in seconds. Start creating for free today at Glima.ai.